In an earlier post, I introduced Party Time and their need to streamline scheduling across their entire fleet using Salesforce and Field Service Lightning. This post covers how I built their custom Drag & Drop Kanban.
The Build
Creating a static Kanban would NOT have been difficult … but they wanted “drag and drop.” With that one [rather firm] requirement, they introduced the need for JQuery UI Sortable to pull off the desired user experience.
I began making plans to build
-
a Lightning Component that would implement jQuery and jQuery UI,
-
an Apex controller for all of the CRUD operations,
-
a few custom fields to store ranking details for the cards,
-
and some Process Builders and Flows for keeping it all in sync with standard FSL functionality. (Note: I won’t go into detail about these PBs and Flows in this post.)
Quick Side Note
I must give credit where it is due. When I first started down this path, OF COURSE I GOOGLED IT to see if anyone had done it before! (Why re-invent the wheel?) This blog post got me started, and I modified from there: Kanban Using Lightning Components (by Shruti Sridharan)
Set Up Lightning App & Component
Let’s start with some scaffolding.
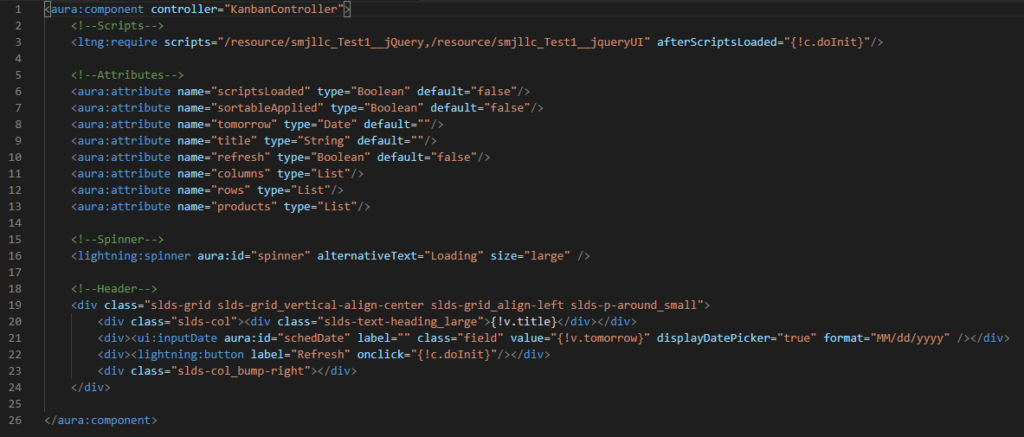
I created a Lightning Component called Kanban and referenced its controller, KanbanController.
At the top of the component, I included the jQuery and jQuery UI library files uploaded to my org’s Static Resources. It’s very important that these scripts load BEFORE the rest of the elements contained within the component, so be sure to include the property “afterScriptsLoaded” and then the name of the client side controller function to execute right after (in my case, {!c.doInit}).

Then I created a Lightning Application called KanbanApp and gave it two properties.
-
It implements the “lightning:isUrlAddressable” interface so that this app can be accessed by URL.
-
It extends the Salesforce Lightning Design System (SLDS) so that I can take advantage of pre-existing styles to keep my app consistent with the Lightning Experience.
Then inside the application I reference the Kanban component like so: <c:Kanban/>.

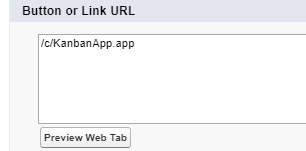
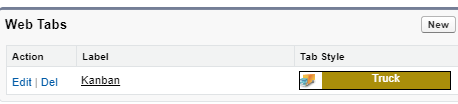
Finally, under Setup > Tabs, I created a new Web Tab called (you guessed it…) Kanban, and I gave it an icon, a height, and referenced the KanbanApp by URL.
Then I went to Setup > App Manager and added the Kanban tab to the navigation options for the appropriate apps.
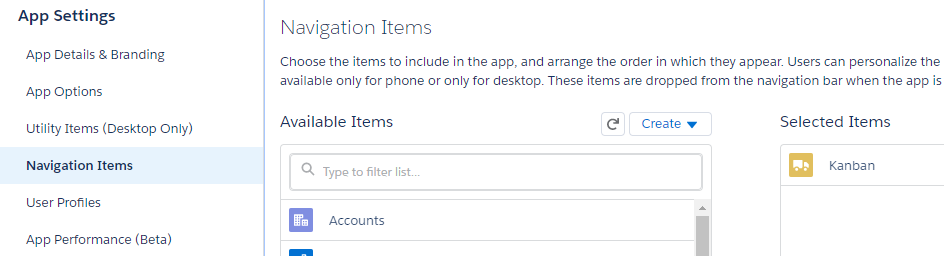
For my demo here, I’m using an app called My App in my developer org, and I only have the Kanban tab showing.

With all of that set up, we can now start building our Kanban board!
Kanban Header & Date Selection
Requirements for the header:
-
The board will load tomorrow’s schedule by default since Party Time typically schedules a day in advance
-
The user needs to know what day she is currently viewing
-
She needs to be able to change the date if she wants to schedule further in advance
I also implemented that lightning:spinner component as a user-friendly way to indicate when the page is still loading.
Go ahead and add all of these attributes too, some of which will make more sense later.
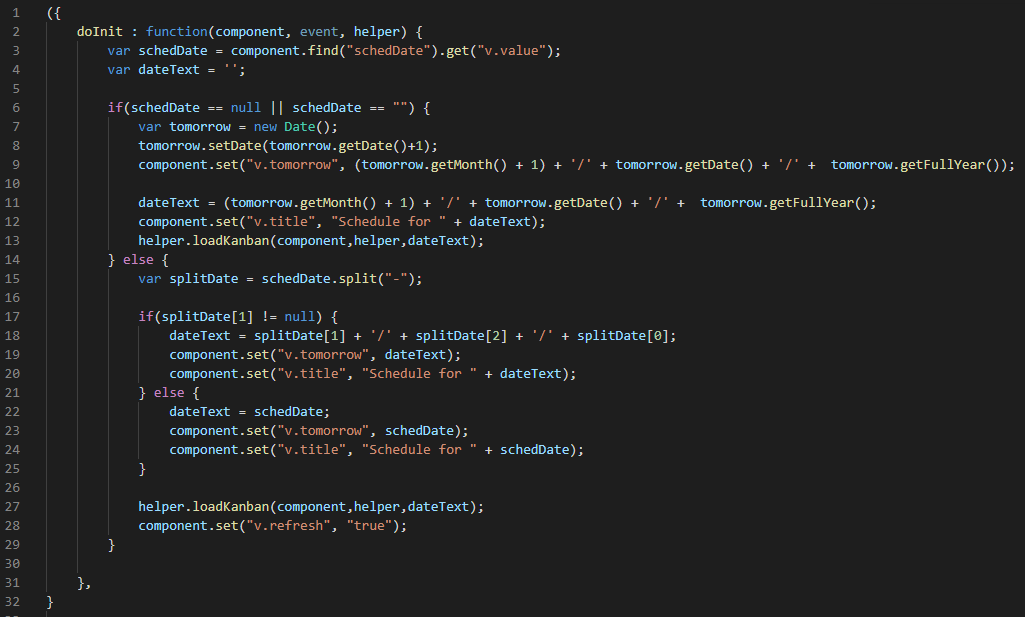
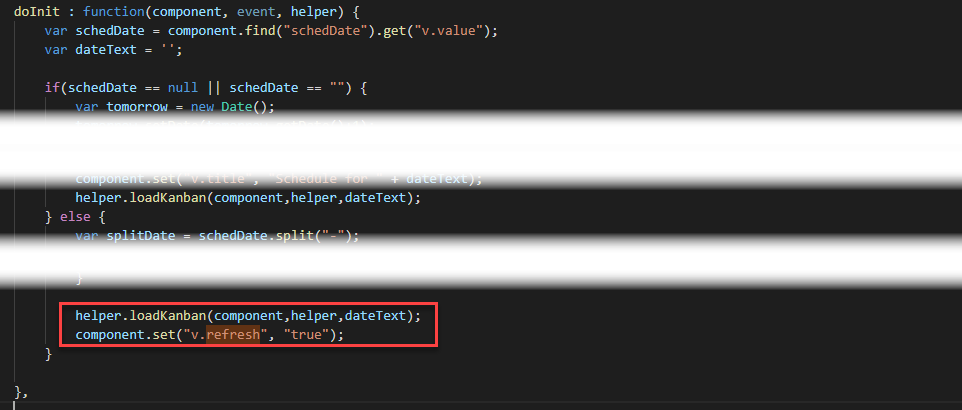
Now let’s look at the client side controller and the {!c.doInit} function.
This function runs AFTER the jQuery and jQuery UI scripts are loaded (again, very important), and it is also the onclick handler for our “Refresh” button. Whenever the Kanban loads for a particular date, either on first page load or when that button is clicked, doInit() determines what date to load the deliveries/pick-ups for, formats the dates displayed on the page as MM/DD/YYYY, updates the page title, and calls the helper function loadKanban() for loading the kanban.
With these pieces in place (and be sure to comment out the helper.loadKanban() references first), you can now save, deploy, and test your changes on the Kanban tab if you want to.

The Kanban
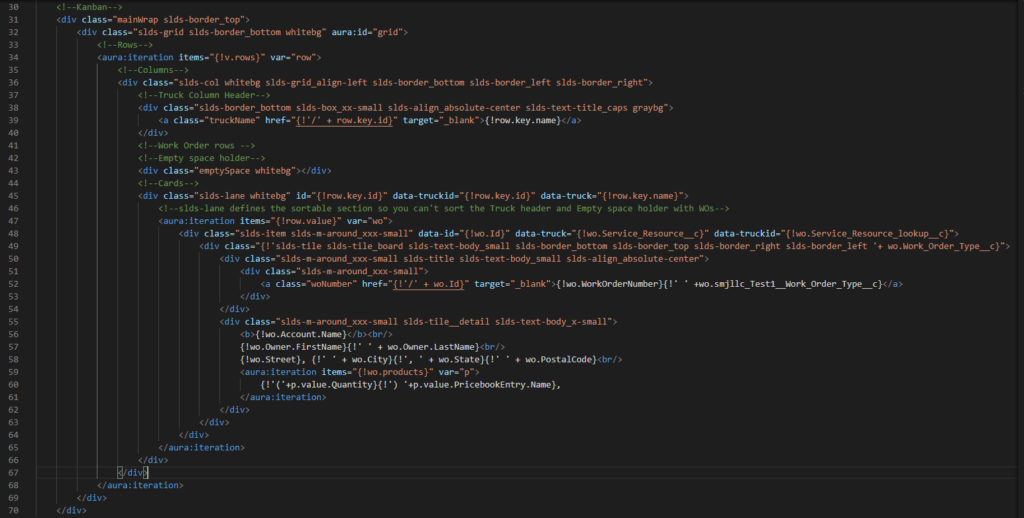
Time to build the Kanban! First we’ll wrap it in a main <div> and then create a grid layout using “slds-grid” within that. (You’ll notice some custom styles at this point too, and I’ll paste my CSS below.)

Now we’ll start the Rows. This is where it might get a little confusing because we’re used to thinking of Rows in a table as horizontal, and then Columns across the top as vertical. But here we’re going to assign our rows as the trucks, display them visually as columns, then put stuff in them…
…but before we go further with the HTML, let’s jump to the Apex class/controller and review the data model.
Data Model
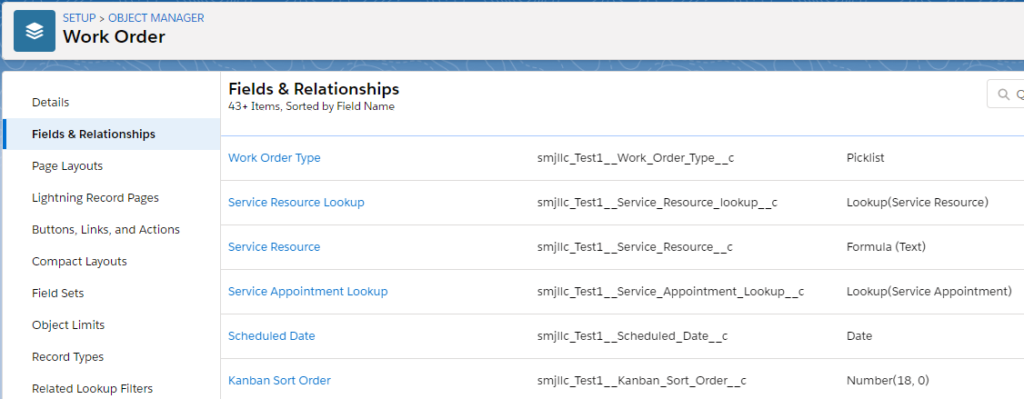
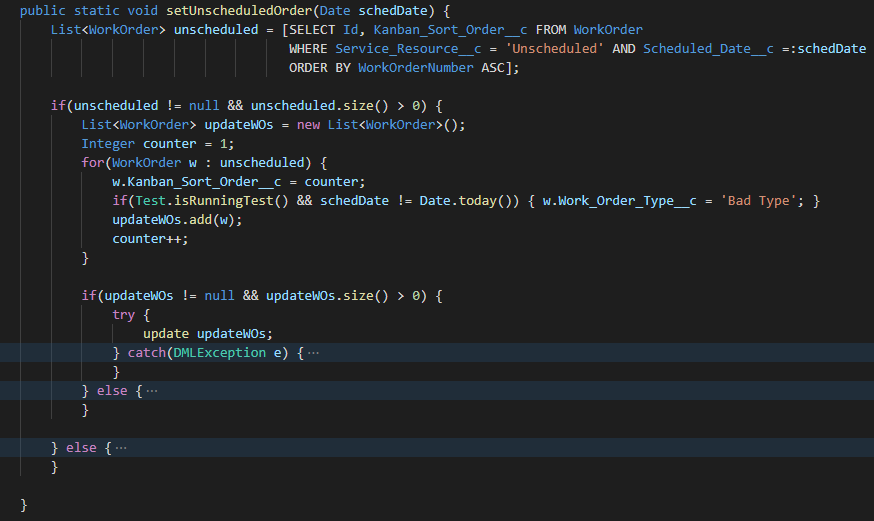
For the Trucks, we’re using the FSL Service Resources object. I added a number field to this object called Kanban Order which stores an integer that allows me to retrieve the Trucks in a particular order for display on the Kanban. In our use case, “Unscheduled” is a Service Resource with a Kanban Order of 1, “Truck 1” is a Service Resource with a Kanban Order of 2, and so on.

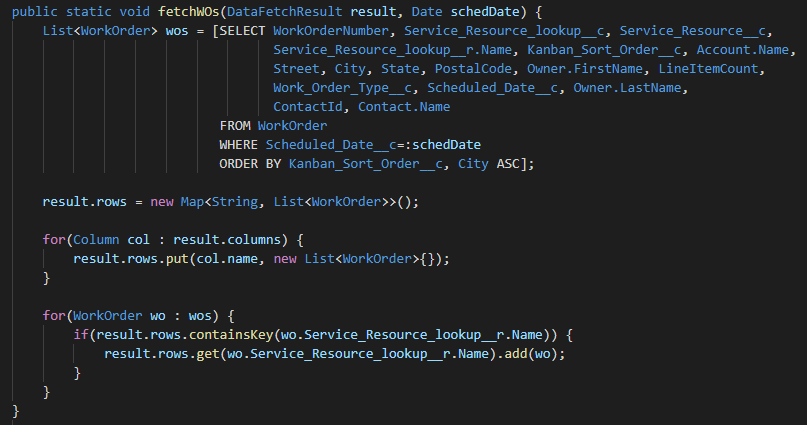
For the deliveries and pick-ups, we’re using Work Orders. I added a few fields to this object…
-
Service Resource lookup field so that each Work Order can be tied to a truck.
-
Kanban Sort Order allows me to apply a rank to all Work Orders that appear in a column for a specific truck
-
Work Order Type indicates delivery/pick-up
-
Scheduled Date is used to filter the Kanban by a date
-
Service Appointment lookup is one of the ways that we’re keeping all of this tied to FSL (not covered in this post)
For the items on the truck, we’re using Work Order Items, which have been customized with a lookup to Products for this client. For this post, I am going to skip going into much detail on including these in the mix so that we can keep it simple and focus on the drag & drop of Work Orders only.
Apex Class/Controller
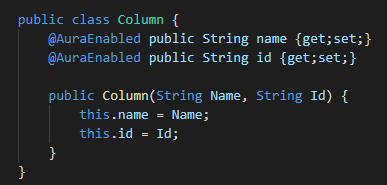
Within the KanbanController class, we have defined a few additional classes with custom properties that provide us with the data we need in the structure that we want it.
A Column has an Id and a Name, which is the Service Resource Id and Name of the Truck.
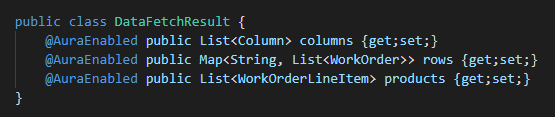
A DataFetchResult is comprised of a few things.
-
List of all Columns/Trucks
-
List of Rows/Work Orders mapped to the name of the Truck they belong in
-
List of Products/Work Order Items that belong to each Work Order
The component’s helper function loadKanban() calls the Apex controller’s initialize() function which retrieves a DataFetchResult for the Scheduled Date passed in.
The initialize() function
-
Sets ordering/ranking on the Unscheduled Work Orders
-
Gets all of the Trucks, including Unscheduled, and in Kanban Order
-
Gets all Work Orders for those trucks in Kanban Sort Order
-
Gets all Work Order Items/Products (not covered in this post)
initialize()
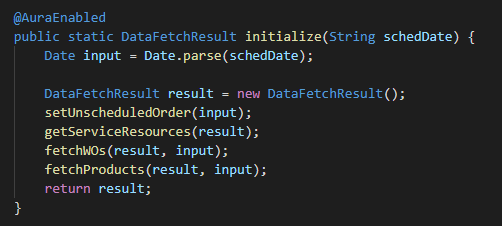
setUnscheduledOrder()
getServiceResources()

fetchWorkOrders()
Client-Side Controller & Helper
The DataFetchResult is returned to the client-side controller where the data is then pushed into the component attributes for display on the page.
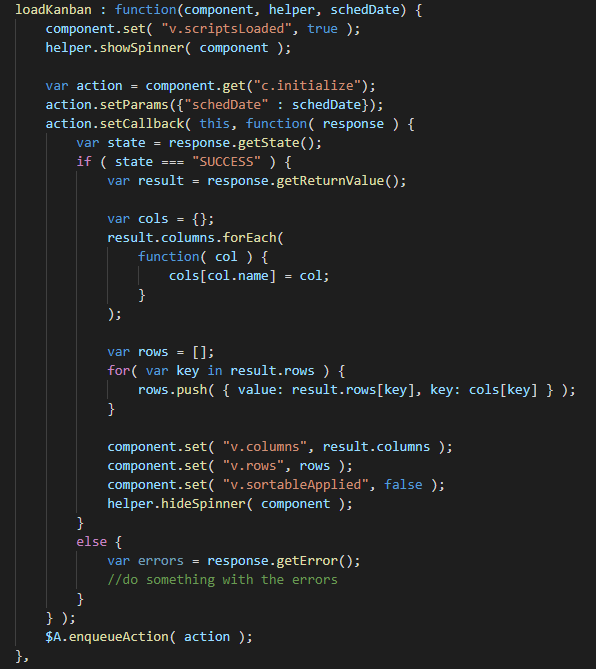
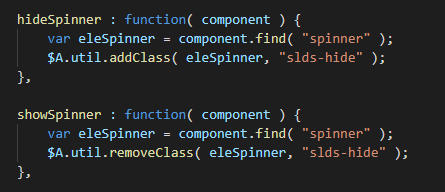
Here are the showSpinner() and hideSpinner() functions in the helper file:
Back to the Kanban HTML
Since ranking is handled on the server side in the way we retrieve our data (Kanban Order for trucks, Kanban Sort Order for the work orders within those trucks), I’m trusting that and using the aura:iteration component to render it all.
The Drag & Drop Part
To implement the drag & drop part, go back to the top of the component and put these handlers in place:

The render event handler is used for doing post-processing stuff on the DOM, which is exactly where we want jQuery UI to be applied. So here we are using it to call a function in our controller called applySortable().
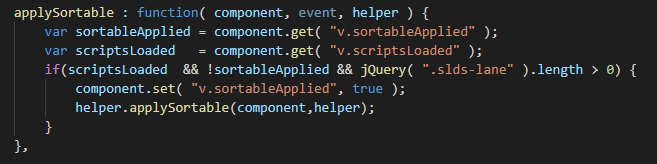
It does some pre-checks and then calls the helper’s applySortable() function. (Yes, I could have and probably should have named them differently…)
The change event handler is used for re-applying the sortable stuff to the DOM after the user has clicked the Refresh button to reload the Kanban for a different date. Since the render event wasn’t firing in this case, we needed a second handler to respond to the refreshed Kanban, and we’re doing that by setting a Boolean attribute called “refresh” to True after the Kanban is reloaded.
For both handlers that call the helper’s applySortable() function, this is what it does.
-
The <div> assigned to class “slds-lane” becomes our sortable area within each column
-
The <div> assigned to class “slds-tile” becomes the sortable item that can be dragged and dropped
-
The <div> assigned to the class “slds-item-placeholder” becomes the area where a card can be dropped into.
Several other properties are set as well, such as scroll speed, cursor type, etc. See the full spec for options.
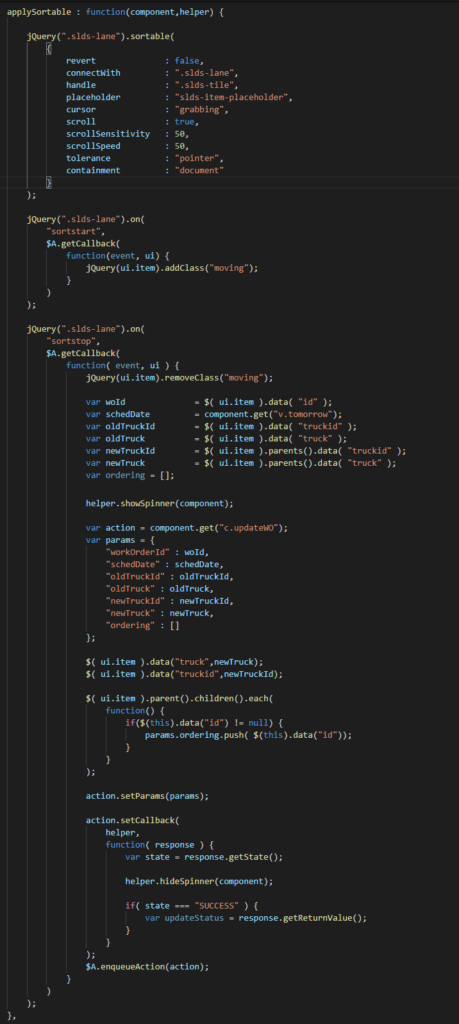
Start Drag
This function also defines what should happen when the item starts being dragged (“sortstart”). When starting to drag, the CSS class “moving” gets applied to it. That style definition is pasted below.
Stop Drag (Drop)
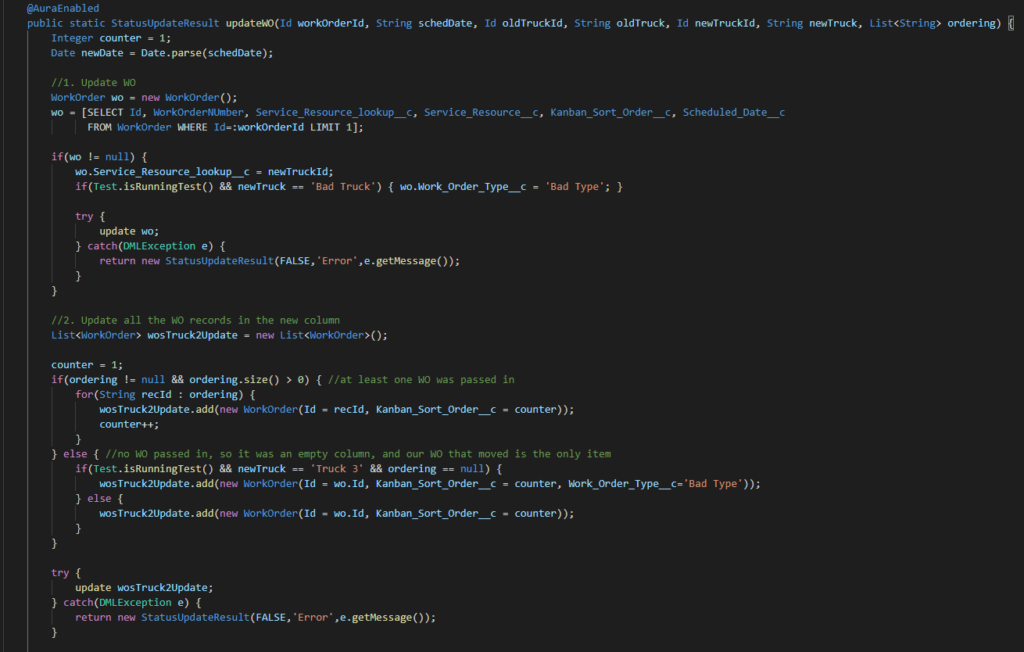
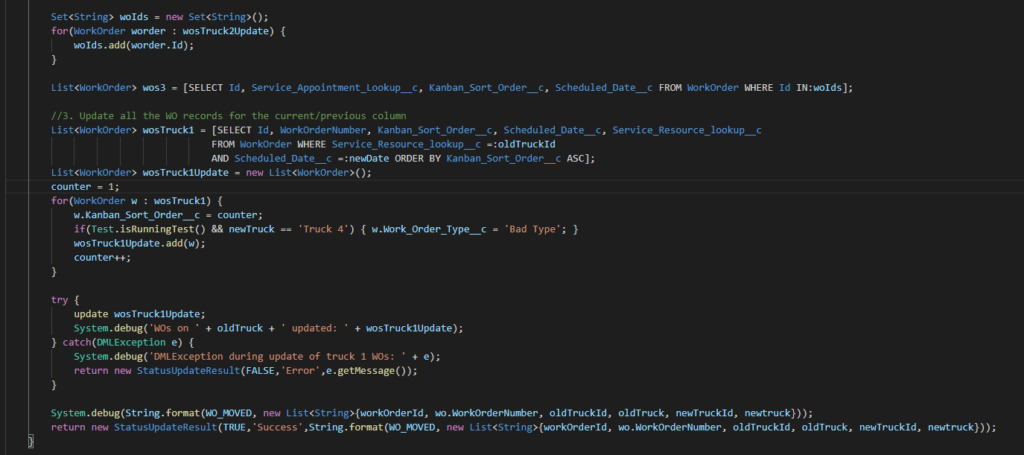
When stopping the drag/dropping, that’s when we have a lot of work to do on changing the item’s related Service Resource/Truck, rank within the new column and any other work orders in there, and rank within the old column where it was just pulled from.
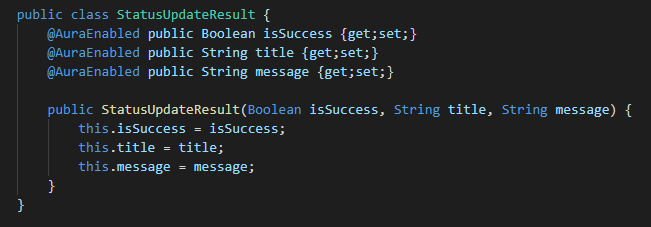
When an item is dropped, the KanbanController.updateWO() function is called. This time, instead of a DataFetchResult, we’re going to get a StatusUpdateResult back, which is made up of a few properties that tell us whether the operation was successful or not so we can do something about it on the client side/handle errors gracefully.
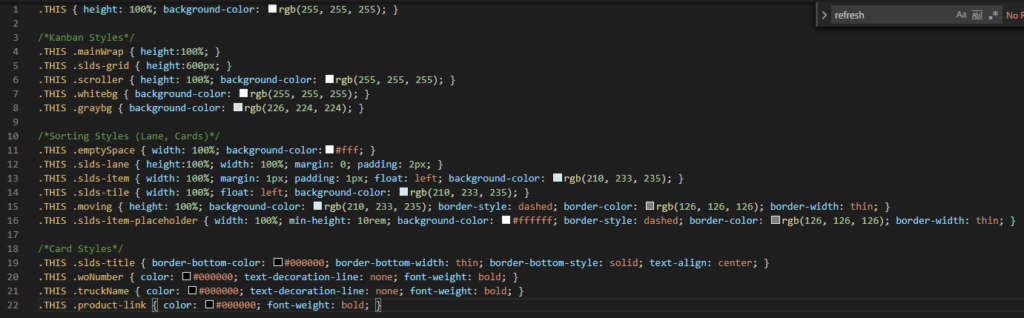
Before we finish up, here is my CSS file:
The Solution
And there you have it! Go to your Kanban and test it out!

One way you can check that everything is truly sorting as it should in the data and not just in the UI is by running this query in the Dev Console and refreshing it after dragging and dropping.

I hope you’ve enjoyed this little adventure and learned something new. Please leave a comment if this helped you, if you have questions, or even suggestions on ways I could have approached this differently. Thanks for reading!
~SJ